HAP-NodeJS HomeKit Switch
Some time ago when we started planning the renovation of our house we were thinking of adding some HomeKit accessories. Lightbulbs are kind of massively available but in the wall mounted switches are kind of rare to get especially in Europe. So I decided to build something myself based on HAP-NodeJS. Well just building the accessory using some buttons is not a big deal but mounting it into something usable more of a challenge.
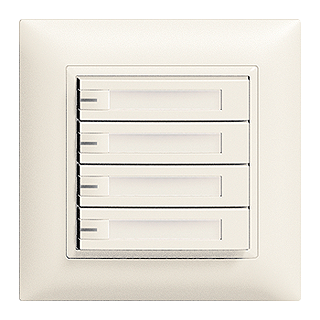
Here in Switzerland the market leader for switches and sockets is Feller. EDIZIOdue is the line of products we were planning to use in our new house so I was researching for something suitable out of that line.
Since the Switch should be driven from a Raspberry Pi running HAPNodeJS the switch should be able to deal with 3.3V GPIOs and and the Raspberry PI must be able to drive LEDs from 3.3V GPIOs. It looked like the EDIZIOdue colore UNI-Taster would be the perfect match to achieve that.
Well the switch can be operated with 5-48 V DC which looks too much for the PI but it turned out that it works perfectly. Since there is no screw adapter for wiring available (there is another variant of that switch with a screw terminal but the voltage range is too high. The switches works fine, but the LEDs are barely lit. I tried and switched to use the on with the headers) I had to create a small adapter board for the switch and of course a HAT for the Raspberry PI.
I created two boards using Eagle and ordered them via OSH Park
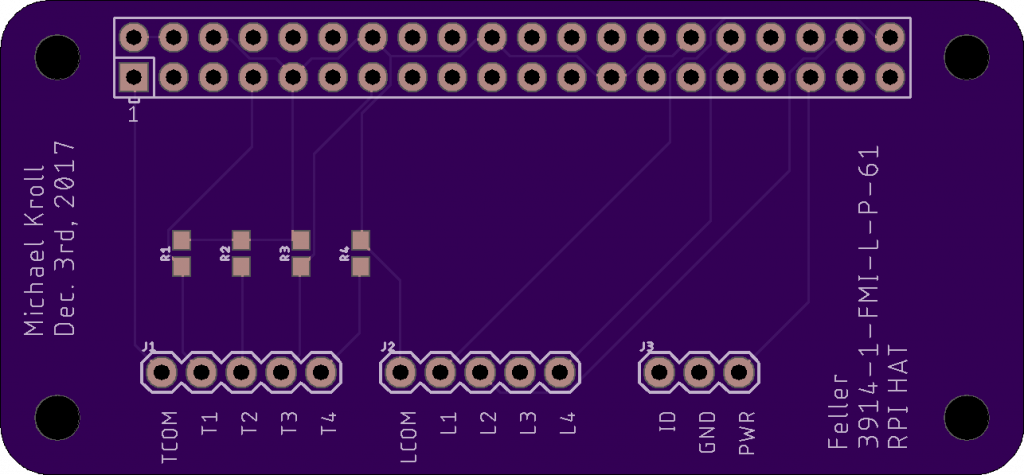
Feller 3914-1-FMI-L-P-61-Breakout-Board-RPI-HAT
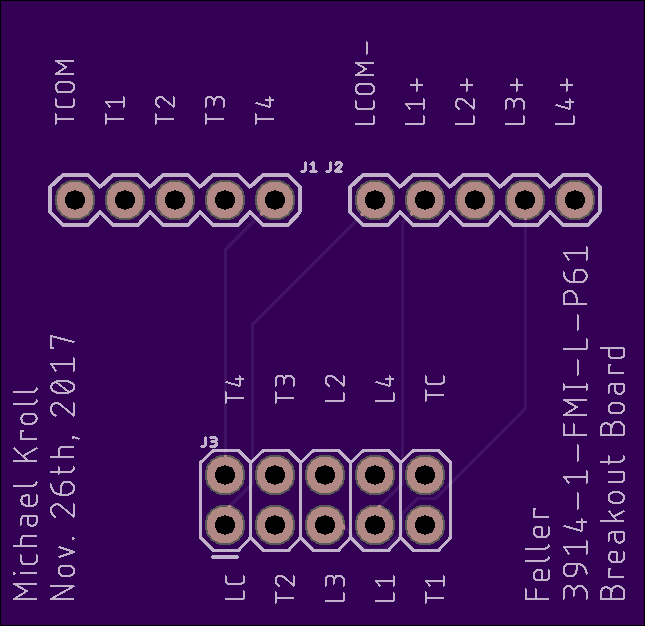
Feller 3914-1-FMI-L-P-61-Breakout-Board
The boards needs just headers to connect to the hardware and the RPI board need some pull-up resistors for the switches to work. On the RPI HAT there is an LED connector for the ID LED and a Power LED which is driven by the NodeJS code running on the RPI.
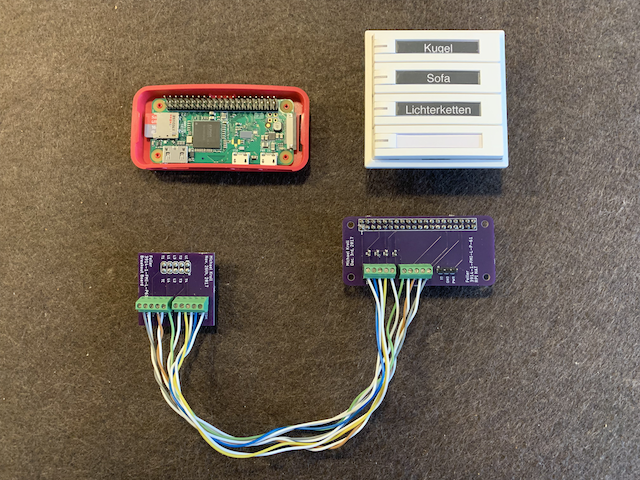
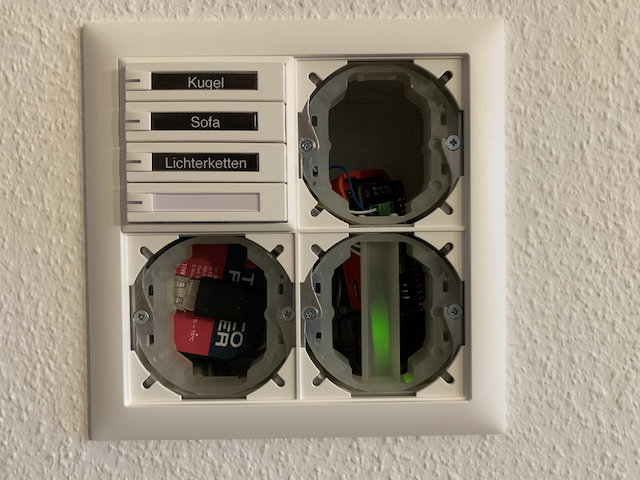
The resulting soldered and wired setup looks like that. The switch supports small lay ins for paper printed labels that you can change as easy as you can change the automation settings in the Home app.
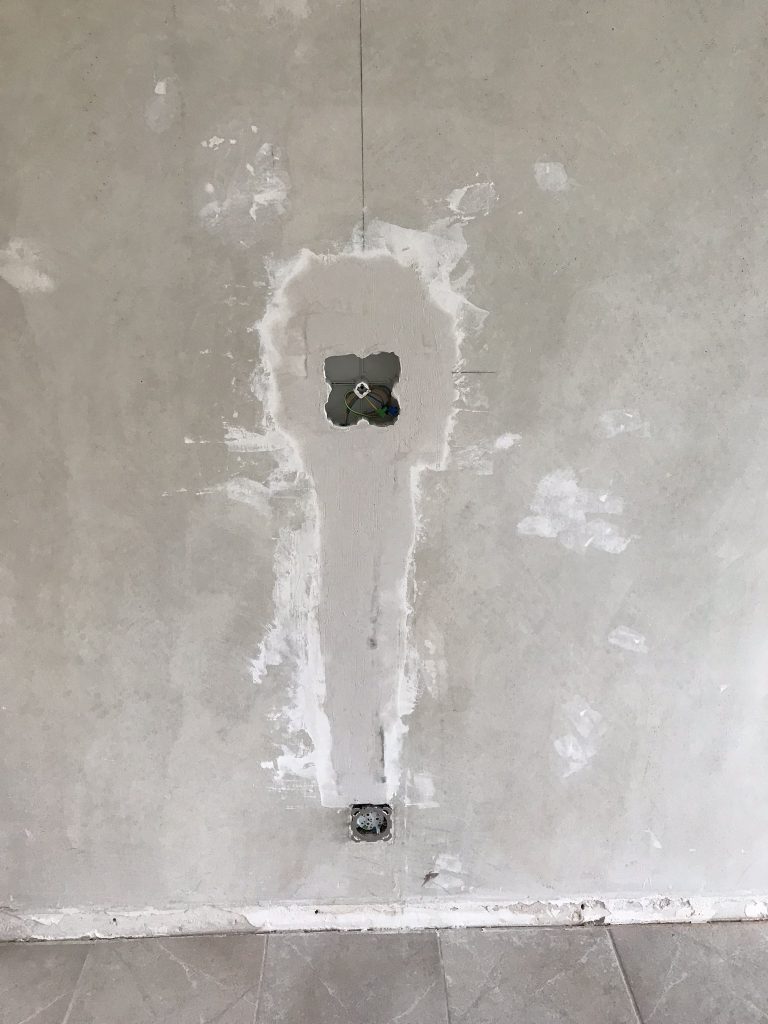
Well those parts look a little too much for a single whole in the wall as a replacement for a standard switch. Sure it is. Since we had full control on what we can change in the house I did some “manipulations” to get enough space for that setup and future improvements/replacements. A whole needed to be created in the wall to fit a 2×2 in wall enclosure.

On top of a socket I created a hole for tubing and a 2×2 in wall enclosure. Here you go. The enclosure is in and a 220V power coord is available in that enclosure.
The enclosure is in and wired. The hole still looks big and it is but there needs to be some place for the Raspberry pi and a 5V power supply.
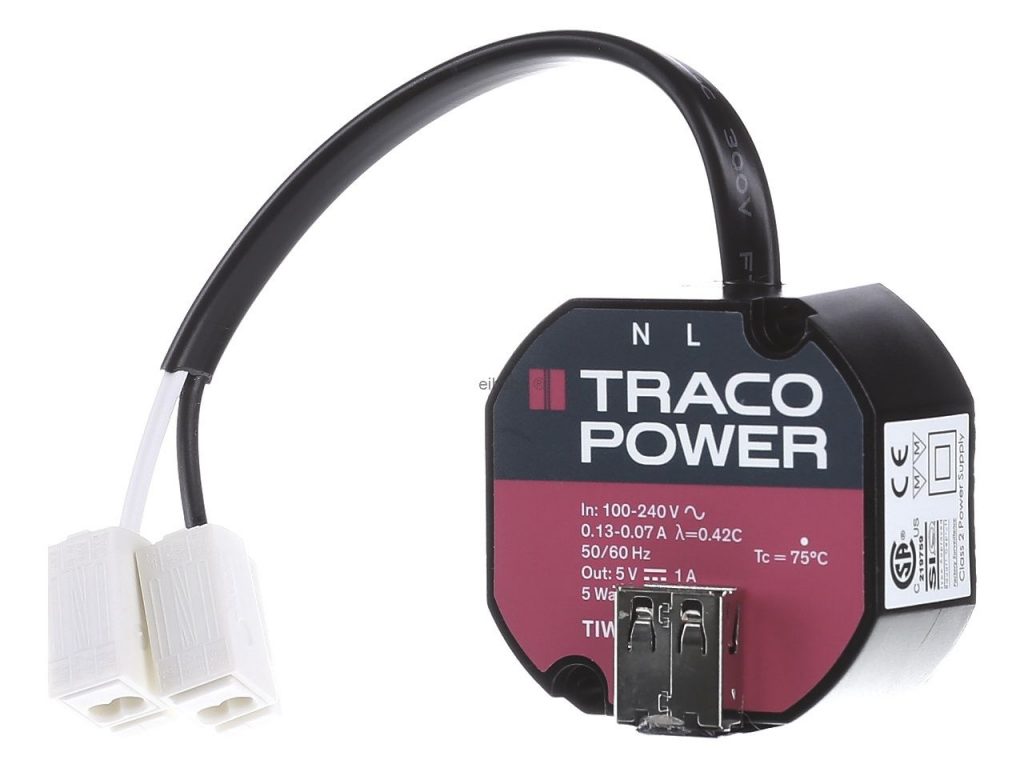
The power Supply used inside the in wall enclosure to drive the Raspberry Pi.
With attached power supply there are only 3 spaces left in the 2×2 enclosure…
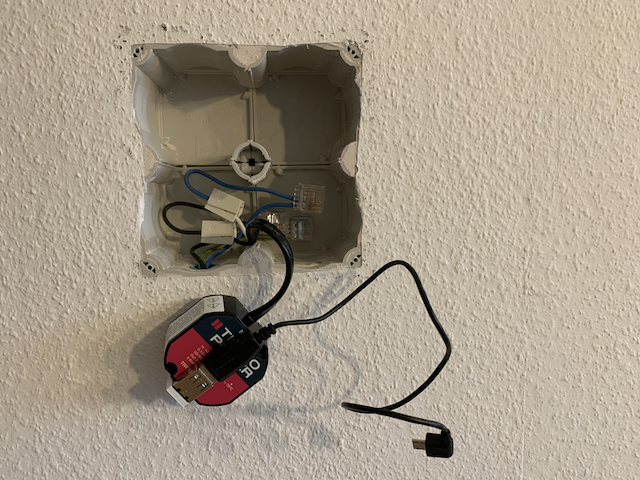
Power Supply added.
Switch and Raspberry mounted. All lids on the 2×2 enclosure closed.
Raspi connected to the Feller switch and the power supply.
Closing the installation down using three simple lids and it can be used as a standard switch. Normally no-one recognises that is a HomeKit switch.
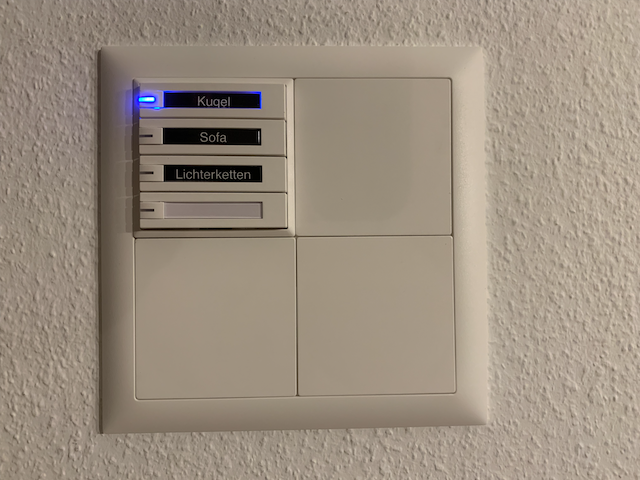
The first switch is on as the LED states.
Since everything is installed now and the accessory is working properly you can use the switches in the Apple Home app as you would use any other accessory.
Video illustrating the use of the switch in the Home App.
If you have further questions or interested in the HapNodeJS accessory code please don’t hesitate to contact me.
Best
Michael