Preview of the K-Duino
Hello everyone,
initially I was planning to use the ATmega2560, similar to the setup used on Sparkfun’s Mega Pro 3.3V https://www.sparkfun.com/products/10744 to create an Arduino Clone of my own. I played around with an ATmega644p some months ago before I created the BLE-Shield but I stopped working on it due to the lack of spare time invested into other interesting projects. Since the 2560 is somewhat expensive I found out that some people have build Arduino Clones based on the ATmega1284p 40 Pin DIP version. But I wanted to use the TQFP version of the uC and started to wire up an initial prototype which I need to work on to create a solid basis for future boards e.g. integrating BLE on the same board as well. The ATmega1284p has two hardware serial ports and 16k of Ram while offering 128k of Flash for sketches.
My setup should use as few parts as the Arduino Pro 3.3V or the Mega Pro 3.3V running at 8MHz frequency. Programming sketches should be done using an FTDI adapter and the board should be powered by a Lipo as well. So that’s what the board setup for the v0.5 of K-Duino looks like:
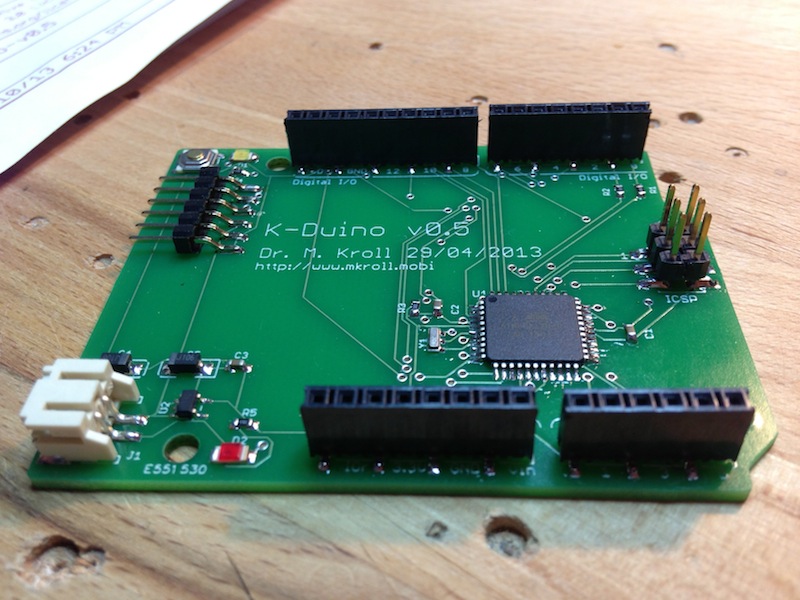
There are no through hole parts used. Even for the ICSP an the Shield headers I’m using SMD parts. The resulting board size is slightly bigger (70x56mm) but it is still compatible with Arduino Shields. Currently I’m using the Mighty Bootloader (https://github.com/maniacbug/mighty-1284p#readme) but the one I’m using is configured for the 8MHz internal oscillator of the uC. I will try to compile the Optiboot bootloader for the K-Duino during the next days. I adjusted the pins_arduino.h file so that the blink sketch is working properly with the K-Duino. More tests need to be done. In the meantime I found the Goldilocks project on Pozible, which is using the 1284p uC as well http://www.pozible.com/project/18609. Phillip Stevens is using an 20MHz oscillator in his setup and a more advanced approach to program the uC using another ATmega32u2 to program sketches without serial bootloader.
Finally you’re guessing right. K-Duino is just the first step to create another BLE device: K-Duino + BLE-Shield = BLE-Duino 🙂 But before that, I need to check how to program the bootloader for the 1284p and setup the pins_arduino.h file correctly.
If someone is interested to contribute don’t hesitate to contact me! Feature requests are welcome as well.
Thanks for reading,
Michael.