BLEBee v1.0.0
The BLEBee is a Bluetooth Smart enabled XBEE form factor module based on BlueGiga’s BLE112 module. The BLEBee can be used in hardware setups, where normally an XBEE module is used. Using a BLEBee an XBee socket enabled embedded system can communicate with desktop computers, smartphones, table computers and even other embedded systems providing Bluetooth Smart aka Bluetooth Low Energy (BLE) or Bluetooth 4.0.
Since I’m working with lot of different Arduino based boards and clones, the BLEBee was designed to run with Arduino boards. Due to the form factor of an XBee the module can be used with order uCs and Embedded Systems as well, but are totally untested! I will test the BLEBees with different Arduino boards, XBEE Shields etc. only. The tested boards are listed at the end of this post.
NOTE: Please note, that the BLEBee is in XBee form factor, but it’s firmware is not intended to be used as cable replacement using two BLEBees. There is no configuration to somehow pair two BLEBees as you would normally do with two XBees. The BLEBee is intended to be used on Arduino or other embedded boards, where you need to transfer data to a device acting as Central such as an iPhone, iPad, Notebook or Desktop Mac/PC.
Since I’m the Author of the BLExplr application for iOS which can be purchased from the Apple App Store, the samples on how to transfer data between an iPhone, iPod Touch 5th generation or an iPad will be using this app.
The BLEBees 3D rendering showing its pinout is illustrated in the following picture:

In order to save space on the BLEBee the reset button which has been used on the initial prototypes has been omitted completely. The programming header where the CC-Debugger can be attached has been changed to use a TagConnect PCB header to reduce size and cost. An adapter will be available shortly if you really want to modify and reflash the firmware yourself.
Pins not controllable by characteristics
The /RESET (Pin 5) is not controllable by a characteristic, but can be driven from the underlying embedded system or uC to reset the BLEBee. The ASSOC (Pin 15) is always set to high if a connection is established and set to low if it is disconnected. (not affected by the Enable Connection LED characteristic).
Service and Characteristics
The final BLEBee has some small firmware changes compared to the one available in the beta test BLEBees. See the list of supported serviced and characteristics where the changed behaviour is described:
Services
BLEBee Service v1.0.0:
EF080D8C-C3BE-41FF-BD3F-05A5F4795D7F
Characteristics
Bluetooth Device Address (Read):
38117F3C-28AB-4718-AB95-172B363F2AE0
Baudrate (read, write):
2FBC0F31-726A-4014-B9FE-C8BE0652E982
Supported baudrate values are:
- 0x00 = 9600 Baud (default)
- 0x01 = 14400 Baud
- 0x02 = 19200 Baud
- 0x03 = 28800 Baud
- 0x04 = 38400 Baud
The baudrate setting is written to the internal storage of the BLE112 module, so the setting will persist even if you remove power from the module. During the next boot cycle after repowering the module or resetting it, the baudrate setting is restored from flash. So there is no need to reconfigure the BLEBee every time you power the module.
Enable Connect LED (read, write):
15079C1B-F22C-4EA8-A183-AAD62372DC14
This new characteristic is used to change the bahavior of the blue LED on the BLEbee which indicates the connection status of the BLEBee.
Supported values are:
- 0x00 = LED is not used to indicate a connection (Default)
- 0xFF = LED is used to indicate a connection.
So don’t worry if the LED is not turned on while connected if you are using the BLEBee the first time. It is turned off by default. You need to change the characteristic first to 0xFF in order to use the LED. The setting is also persisted into the BLEBees flash memory, so the setting persists between power and reset cycles.
RX (Read, Notify):
A1E8F5B1-696B-4E4C-87C6-69DFE0B0093B
The RX characteristic is used to receive data on the e.g. iOS Side. Whatever you write to the BLEBees TX pin will be notified on the RX characteristic on iOS. there is no longer an RX buffer involved which needs to be filled up before the buffer data is notified on the iOS Side. Every single byte is not notified.
TX (read, write, write-without-response):
1494440E-9A58-4CC0-81E4-DDEA7F74F623
Data which is send from the e.g. iPhone to the BLEBees TX characteristic and is then received on the RX pin of the BLEBee. The maximum amount of data which can be send at once is 20 bytes due to BLE and iOS implementation restrictions.
D0 Output (write, read):
7F21B8AF-6E87-44E0-B17E-5928C272E78C
This characteristic in an output pin to control e.g. a relay which is attaced to this pin. The values which are supported by this characteristic are:
- 0x00 = set the pin 20 (CH0) low
- 0xff = set the pin 20 (CH0) high
D1 Output (write, read):
47F39196-A9E9-4F16-A13D-C2B56647FEB6
This characteristic in an output pin to control e.g. a relay which is attaced to this pin. The values which are supported by this characteristic are:
- 0x00 = set the pin 19 (CH0) low
- 0xff = set the pin 19 (CH0) high
D2 Output (write, read):
228B778F-6F75-495F-8AD4-591C37E0FF0B
This characteristic in an output pin to control e.g. a relay which is attaced to this pin. The values which are supported by this characteristic are:
- 0x00 = set the pin 18 (CH0) low
- 0xff = set the pin 18 (CH0) high
D3 Output (write, read):
5A6D168F-07C0-48CB-95D0-930CAFD399CA
This characteristic in an output pin to control e.g. a relay which is attaced to this pin. The values which are supported by this characteristic are:
- 0x00 = set the pin 17 (CH0) low
- 0xff = set the pin 17 (CH0) high
Tested hardware setups
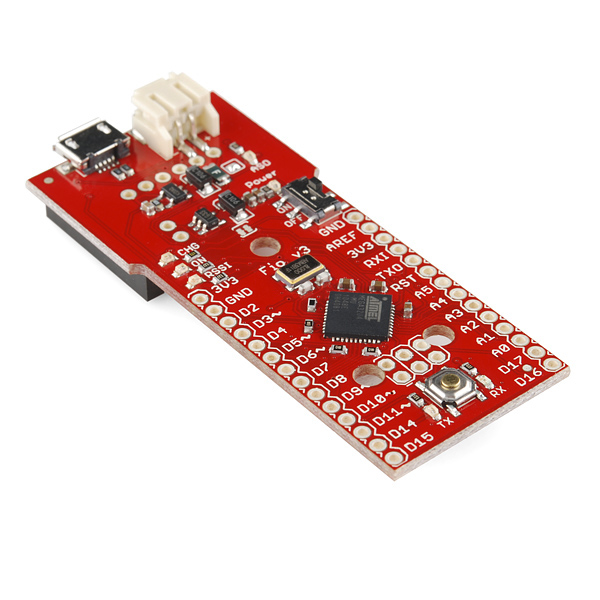
Fio v3 ATmega 32u4
The Fio v3 from Sparkfun Electronics is equipped with an ATmega32u4. This makes it very easy to communicate with the BLEBee from the uC since you can use the Serial1 port, which is wired to the BLEBee and use Serial to communicate over the USB cable to your Mac/PC for debugging purposes. you don’t need to remove the BLEBee from the XBEE header while programming the Arduino during the programming process as you need to while programming the original Arduino FIO. A sample Arduino Sketch is available at github look into the arduino directory where the Fio v3 sketch is named BLEbee_v_1_0_0_FIO3.
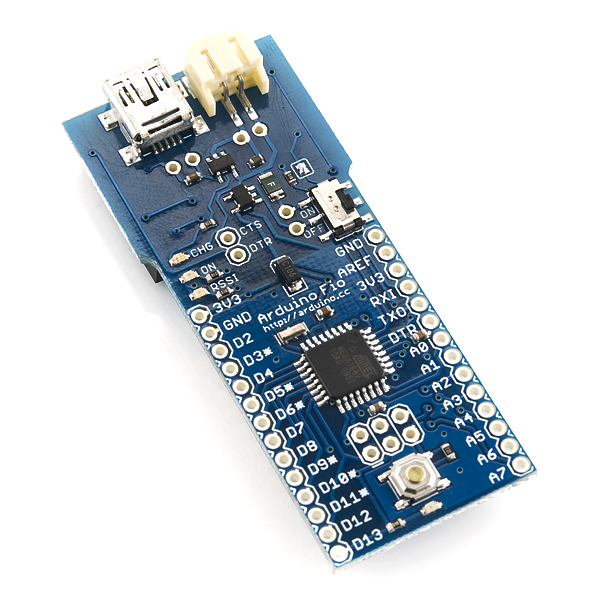
Arduino FIO
The Original Arduino FIO is based on an Arduino ATmega328. Resulting a serial port debug connection using the Serial port will interfear somehow with the BLEbees RX/TX pins. You need to remove the BLEbee from the Arduino FIO while programming the sketch. It works best, when you run the Arduino FIO from a LIPO and transfer data over BLE to the Arduino Sketch. A sample sketch illustrating the use of the BLEbee with the Arduino FIO is also available from my github account. The Sketch is named BLEbee_v_1_0_0_Arduino_FIO.